Generators are a source of on-demand power. If a hurricane, tornado, earthquake, blizzard, or any other natural disaster occurs and the power lines go down – or you lose power for any other reason – with a generator, you’ll have instant access to the power you need to maintain the daily operation of your household.
While generators can certainly save you from the headaches that power outages can cause, the machines themselves can actually cause alot of sound induced headaches.
When they’re powered up, generators produce a lot of noise. That loud humming noise can be a real distraction and a source of serious irritation for your household, as well as the homes that surround you.
There is a way that you can drown out that loud, ear-splitting, headache-inducing noise. By building a soundproof generator box, you can enjoy the on-demand, life-saving power that the machine provides without having to listen to that unbearable droning sound.
With some basic supplies a bit of time and some elbow grease, you can create a soundproof enclosure for your generator.
Before discussing how to build a soundproof box for your generator, it’s first important to understand the different types of noise.
The two main types of noise:
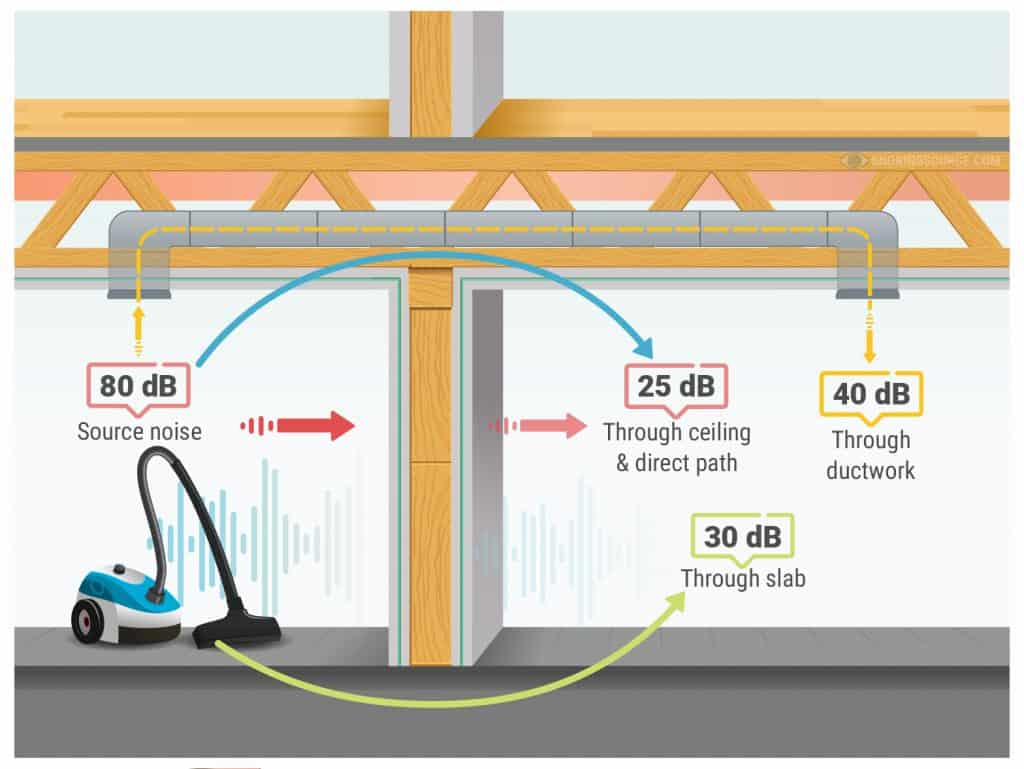
When an object makes noise, it produces soundwaves. Those soundwaves are then carried through a medium until they collide with a solid structure, causing the sound to travel through the structure and into the adjacent area.
With airborne noise, as the name suggests, air is the medium that soundwaves are transmitted through. With a generator, the soundwaves are picked up by the air and travel in an omnidirectional fashion until they collide with a wall or a door, for example.
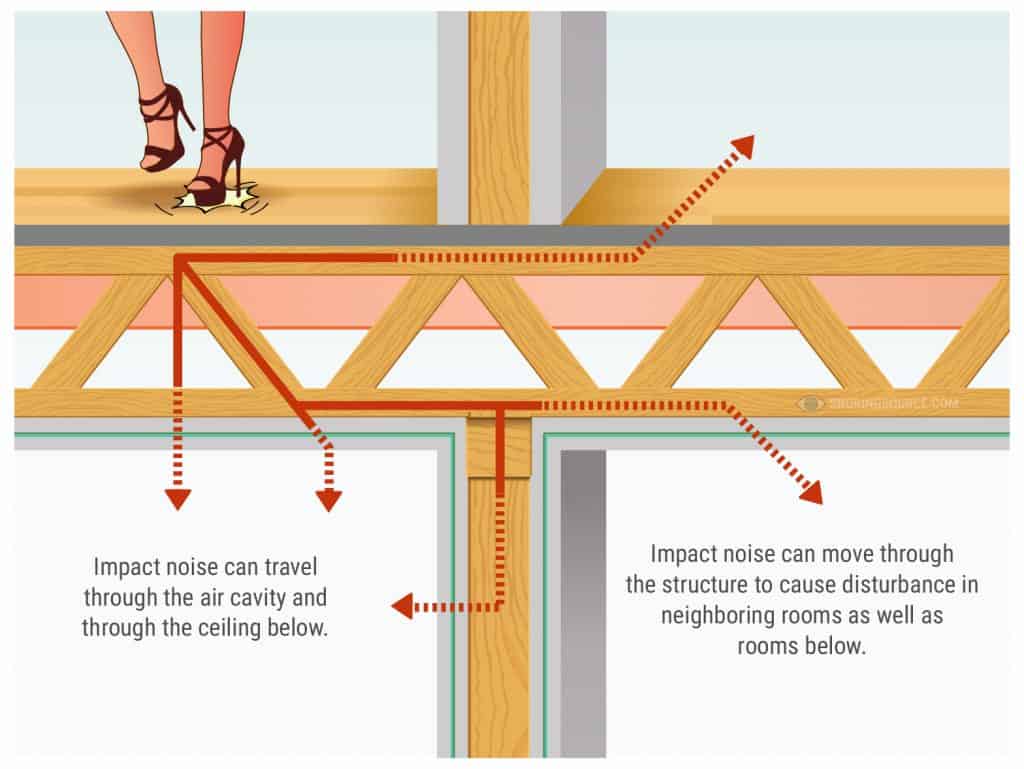
This kind of noise occurs when an object impacts a structure, and the resulting sound of the object’s impact travels through the structure and into the adjacent space.
When an object collides with a structure, it creates a vibration, or soundwaves. The medium that the soundwaves travel through is the structure, as opposed to air.
Examples of impact noise include footsteps coming through the ceiling above you, knocking on a door, or in the case of a generator, the vibration of the machine banging into the ground and traveling into your home.
Since generators produce both airborne and impact noise, the generator box will need to be designed in such a way that it prevents both types of noise.
The box will enclose the machine with soundproofing materials that will absorb both airborne and structure-borne noise.
In order to build a generator box, you’ll need to gather the following materials:
First, you need to measure your generator in order to determine what size soundproofing generator box you’ll need to build.
Measure the length, width, height, and depth of the generator, adding several inches to each measurement in order to accommodate the soundproofing materials and ventilation ducts.
To ensure accuracy, take the measurements several times. Make sure to jot down the measurements.

Next, cut the MDF boards to the size of the generator using a table saw or circular saw.
After cutting, label each piece accordingly so that you know which pieces will need to be positioned where during the construction process; the ceiling, the base, and the sides of the box.
Generators need ventilation for two reasons:
In order to create ventilation holes, measure the size of the ventilation ducts that you bought and cut two circular holes in the MDF that match the size of the ducts.
One of the holes should be placed in the piece that will serve as the top of the box.
The hole should be situated near the side of the piece of MDF as opposed to the center.
The second circle should be in the piece of MDF that will be positioned on the side of the generator, opposite the hole on the top piece.
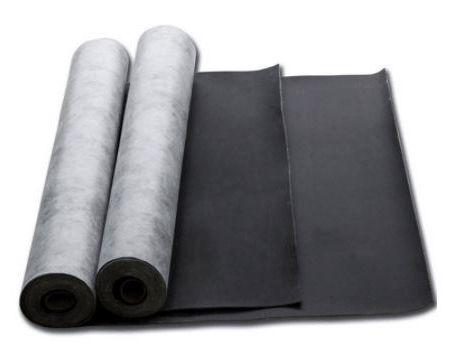
When it comes to soundproofing, layers are crucial. The more layers, the more sound will be blocked. Mass loaded vinyl (MLV) is heavy, yet limp vinyl sheeting that usually is saturated with small metal particles. These metal particles help to increase the mass of the vinyl, which increases its sound absorbing qualities.
When building a box to soundproof a generator, MLV is the first layer of material you should install.
Accurately measure each MDF board and then cut a piece of MLV to the same size as each board. Use Green Glue to secure the MLV to the interior side of its corresponding MDF board. Apply Green Glue to the edges of each piece of MLV to ensure that they are properly secured to the MDF.
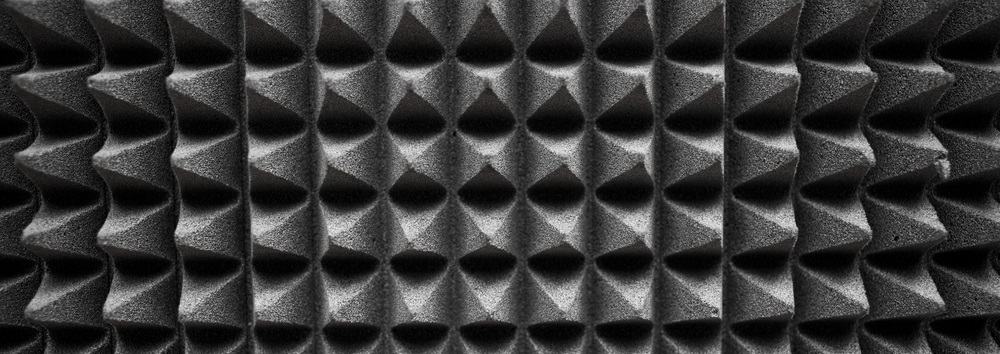
Next, install the acoustic foam mats. Cut the mats so that they are the same size as the MDF panels that will serve as the ceiling and the walls of your generator box.
Using Green Glue, attach the foam mats to the interior of the corresponding MDF boards so that they are positioned directly over the MLV. Once in place, use Green Glue to further secure the edges of the acoustic foam to the fiberboard panels.
Allow the Green Glue to fully dry. Once dry, assemble the box. Position the MDF panels that will serve as the sides of the generator box around the MDF panel that will serve as the ceiling.
Make sure that the walls are placed in the proper location. Screw the panels into place. To allow for easy access to the generator, you can install hinges, as well.
To prevent gaps between the top and the sides of the generator box, we recommend applying Green Glue along the edges of each piece of MDF before screwing them in place.
Since Green Glue is a soundproofing medium, it will help to block any gaps that sound could escape from, thereby improving the soundproofing abilities of your generator box.
As previously discussed, generators need to be properly ventilated. Without ventilation, the machine can quickly overheat and the exhaust fumes will buildup, creating a potentially dangerous situation.
To avoid these problems, you’ll need to create airflow. To do so, position the vent ducts into the ventilation holes that were created in the top and side of the box in step 3.
Ensure that the ducts are properly secured, otherwise they could move around when the generator is in use, which could prevent proper ventilation and reduce the soundproofing capabilities of the box.
A helpful tip: when soundwaves have a straight, linear path, they can easily travel out of the air ducts and minimize the soundproofing capabilities of the box. When installing the air ducts, create bends and turns; doing so, the soundwaves will get trapped in the twists and turns.
Once in place, install vents on top of the openings in the box.
While there’s no denying the benefits of a generator, the noise the machine creates can be a major downside.
By building a soundproof generator box, you can enjoy the useful on-demand power that the appliance provides without having to contend with the disrupting sound it creates.

Snoringsource.com is a participant in the Amazon Services LLC Associates Program, an affiliate advertising program designed to provide a means for website owners to earn advertising fees by advertising and linking to amazon(.com, .co.uk, .ca etc) and any other website that may be affiliated with Amazon Service LLC Associates Program.